23 Oct


0 Comment(s)
439 View(s)
How to create a herringbone tile pattern
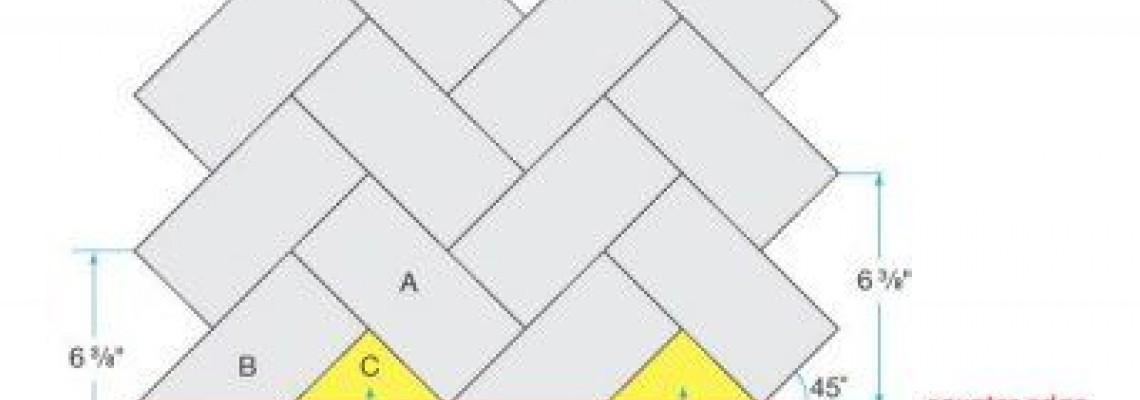
A herringbone tile pattern is a classic and versatile design that can be used in a variety of settings, from kitchens and bathrooms to hallways and patios. It is created by laying tiles at a 45-degree angle to one another, forming a zigzag pattern.
Materials
- Tiles
- Thin-set mortar
- Notched trowel
- Spacers
- Level
- Mastic (optional)
- Tile saw (optional)
Instructions
- Prepare the surface. The surface where the tiles will be installed must be clean, dry, and level. If necessary, patch any holes or cracks in the surface.
- Mark the center point of the wall or floor. This will be the starting point for your herringbone pattern.
- Lay out the first row of tiles. Start at the center point and lay out the first row of tiles at a 45-degree angle to the wall or floor. Use spacers to ensure that the tiles are evenly spaced.
- Lay the next row of tiles. Lay the next row of tiles at a 45-degree angle to the first row, alternating the direction of the tiles. Continue laying tiles in this manner until the entire area is covered.
- Cut the tiles to fit. If necessary, use a tile saw to cut the tiles to fit around obstacles or to create a border.
- Apply thin-set mortar to the back of each tile. Use a notched trowel to apply a thin layer of thin-set mortar to the back of each tile.
- Set the tiles in place. Press the tiles firmly into place on the wall or floor.
- Allow the thin-set mortar to dry. Follow the manufacturer's instructions for drying time.
- Apply grout to the joints between the tiles. Use a grout float to apply grout to the joints between the tiles. Allow the grout to dry completely.
- Seal the grout. Once the grout is dry, apply a sealer to protect it from stains and moisture.
Tips
- If you are new to tiling, it is a good idea to practice laying out the herringbone pattern on a dry surface before you start laying the tiles in place.
- If you are tiling a large area, it is helpful to mark out the herringbone pattern on the surface before you start laying the tiles. This will help you to keep track of where you are and to ensure that the pattern is even.
- If you are using a tile saw to cut the tiles, be sure to wear safety glasses and a dust mask.
- When you are applying grout to the joints between the tiles, be sure to remove any excess grout with a damp cloth.
With a little planning and effort, you can create a beautiful and stylish herringbone tile pattern in your home.


Leave a Comment